Managing Work Centers
A workspace can include one or more work centers to work with the Envision documents. As an Admin, you can create multiple work centers and name them as necessary.
Centers page
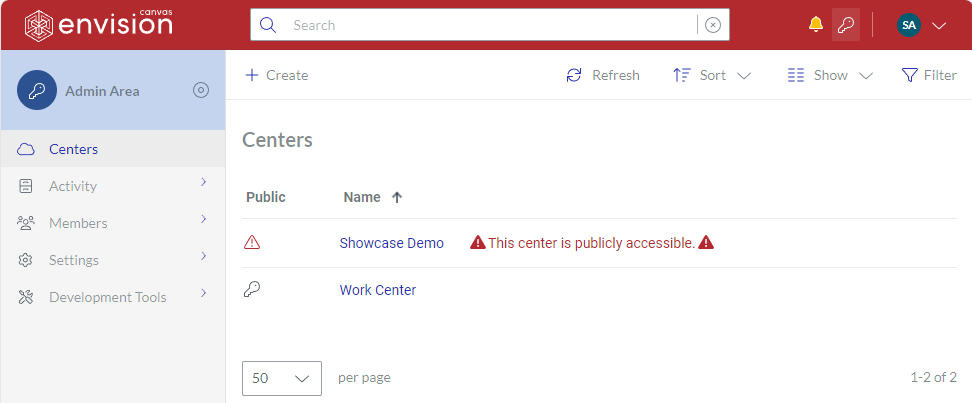
The Centers page is a place in the Admin Area where you navigate and access the work centers for administering them. It displays all the work centers existing in the workspace in the content table, where the work centers are rows, and their properties are columns. To view and manage these work centers, you can use the content table toolbar and action menu.
Accessing the Centers page
To go to the Admin Area for work centers in the workspace:
Click the Admin area button on the Portal top bar. The system leads you to the Admin Area, where the first page is Centers by default.
If you are on another page in the Admin Area, click Centers from the Admin Area sidebar.

The system leads you to the Centers page.
Centers content table toolbar

The Centers content table toolbar provides the following:
The Create button to create work centers.
The Refresh button to refresh the work centers in the content table.
The Sort drop-down list to sort the work centers in the content table by a given column in ascending or descending order.
The Show drop-down list to show and hide table columns.
The Filter button to filter the work centers in the content table against your criteria.
Centers content table columns
By default, the Centers content table displays all its columns:
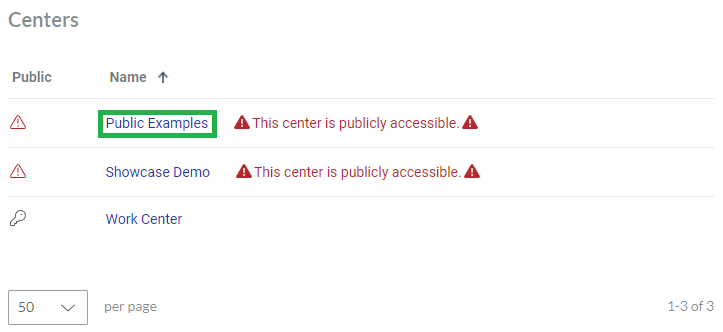
Public: a flag indicating whether a given work center is public or private.
Name: the name of a given work center, clicking which leads to the Home folder of this work center.
With the Show drop-down list, you can hide and show the Public column if you wish.
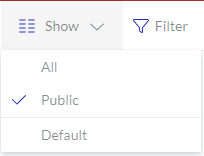
The Name column cannot be hidden. It empowers you with the management features for work centers.
Center action menu

The Name column features the action menu with the following options for a work center:
View Center to view the properties of the work center on the Center page.
Edit Center to update the properties of the work center on the Center page.
Archive to archive the work center.
Download to download the work center.
Delete to delete the work center.
Center page
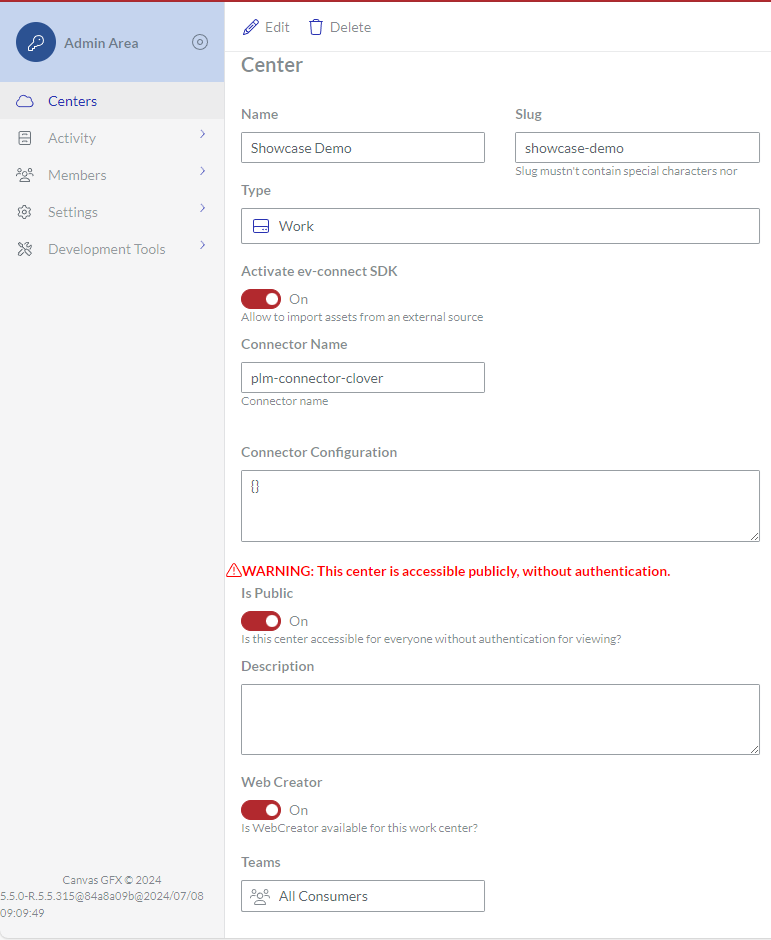
The Center page is a place in the Admin Area where you administer a given work center. It provides the toolbar to manage a given work center and displays its properties in the corresponding fields. You can open the work center in view or edit mode on this page.
Accessing the Center page
To go to the properties of a work center existing in the workspace:
Open the work center from the Centers page content table for viewing or editing, as discussed in the corresponding sections below.
Center page toolbar
The Center page toolbar has the following buttons:
View: to switch the page with a given work center to view mode. This button is visible only in edit mode.
Edit: to switch the page with a given work center to edit mode. This button is visible only in view mode.

Delete: to delete a given work center.
Center page fields and buttons
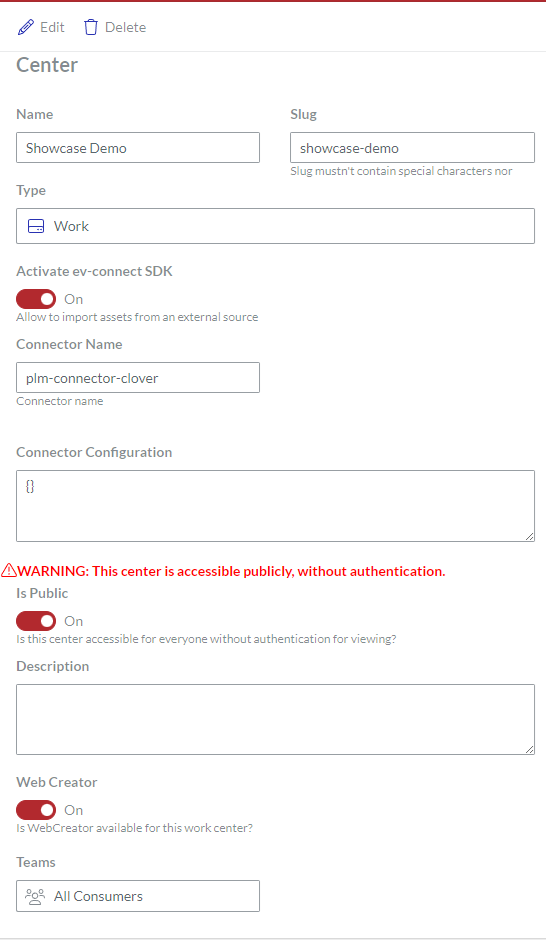
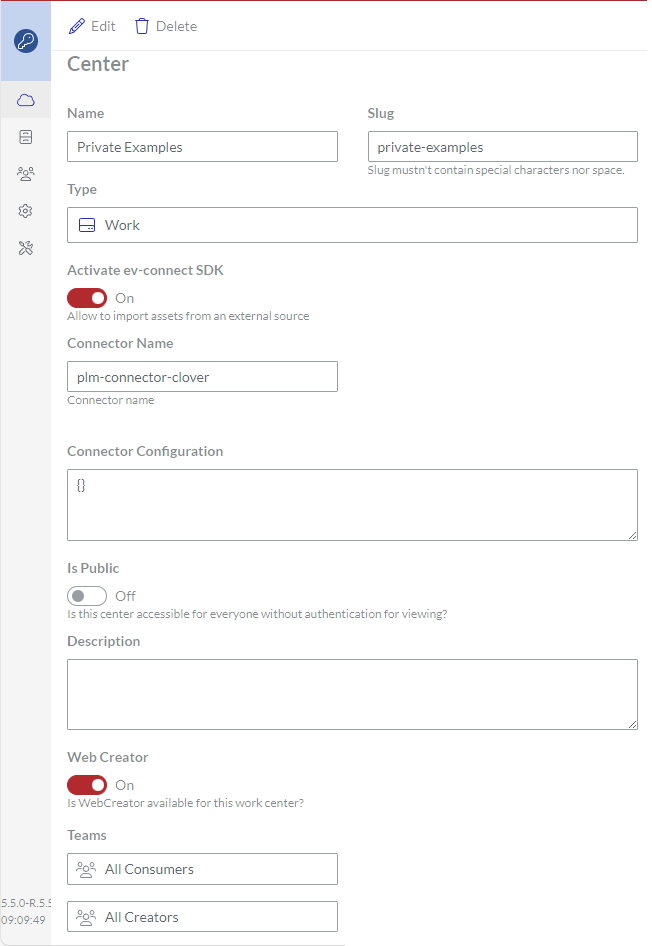
The Center page provides the properties of a displayed work center in the following fields:
Name: the name of the work center.
Slug: a URL slug to the work center. It must not contain uppercase letters, special characters, or spaces. It can include lowercase letters, numbers, and dashes.
Type: the type of the work center.
Activate ev-connect SDK: a toggle to allow importing Envision documents and assets from an external source into the workspace when on. It is off by default. When it is on, the following fields are visible:
Connector Name: the name of a connector.
Connector Configuration: the configuration parameters of a connector.
Is Public: a toggle to allow public access to the workspace when on. It is off by default. The work center is private when it is off.
Description: the short illustrative information about the work center. This field is optional.
Web Creator: a toggle to allow the Canvas Envision Web Creator app for the work center when on. It is on by default.
Teams: the teams that can access the work center. More than one team can be set. What they can do in the work center depends on their account type. Admins can access all work centers.
Creating work centers
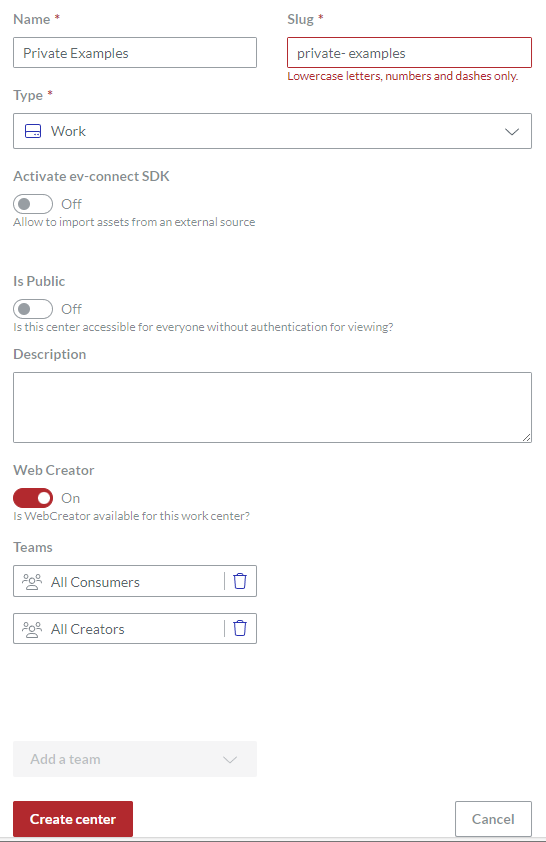
To create a new work center:
Go to the Centers page.
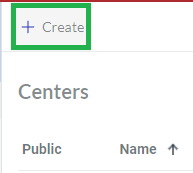
On the content table toolbar, click the Create button.
The Create Center page with empty fields appears.
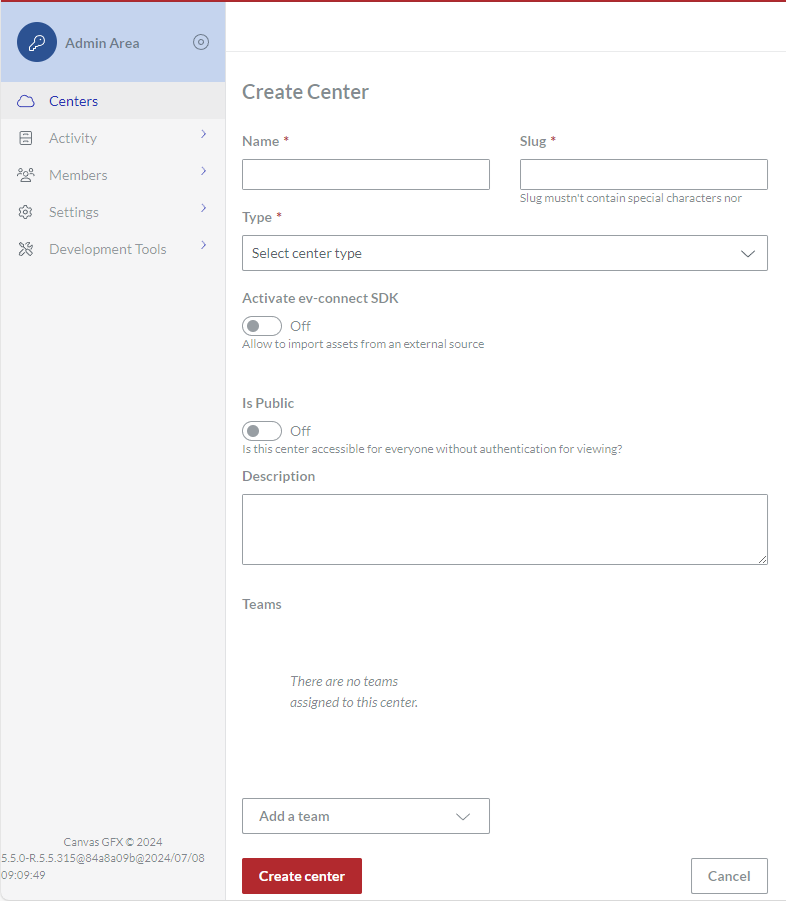
In the Name field, enter the name of the work center.
In the Slug field, enter the URL slug to the work center. It is recommended to enter the work center in lowercase with spaces replaced by dashes. The slug must not contain uppercase letters, special characters, or spaces. It can include lowercase letters, numbers, and dashes.
From the Type drop-down list, select the type of the work center.
Only if necessary to allow importing Envision documents and assets from an external source into the workspace:
Turn the Activate ev-connect SDK toggle on.
In the Connector Name field, enter the name of a connector. It must not contain uppercase letters, special characters, or spaces. It can include lowercase letters, numbers, and dashes.
In the Connector Configuration field, specify the connector configuration.
Only if necessary to allow public access to the workspace, turn the Is Public toggle on.
If necessary, in the Description field, provide short illustrative information about the work center.
Only if necessary to forbid the Canvas Envision Web Creator app for the work center, turn the Web Creator toggle off.
From the Add a team drop-down list, select one or more teams that will have access to the work center. You can select more than one team from the list incrementally.
Click the Create center button.
The system creates the new work center and redirects you to the Centers page.

Viewing work center properties
To view the properties of an existing work center:
In the Centers page content table, go to the work center you want to view.

Click the View Center button from the work center action menu. The system displays the properties of the work center on the Center page.
Updating work centers
To update an existing work center:
In the Centers page content table, go to the work center you want to update.
Click the Edit Center button from the work center action menu.

The system opens the work center for editing on the Edit Center page.
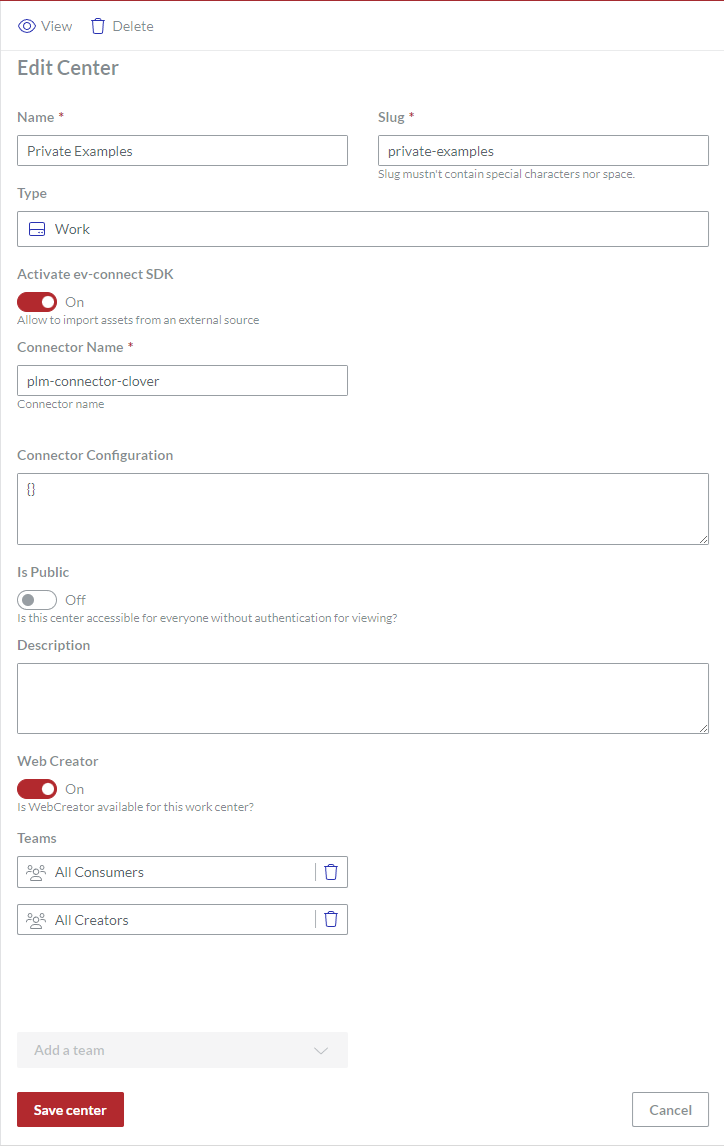
If it is necessary to change the name of the work center, enter the new name in the Name field.
If it is necessary to change the URL slug to the work center, enter the new slug in the Slug field. It is recommended to enter the work center in lowercase with spaces replaced by dashes. The slug must not contain uppercase letters, special characters, or spaces. It can include lowercase letters, numbers, and dashes.
If it is necessary to reverse the permission for importing Envision documents and assets from an external source into the workspace, toggle the Activate ev-connect SDK switch.
Only if you have turned the Activate ev-connect SDK switch on:
In the Connector Name field, enter the name of a connector. It must not contain uppercase letters, special characters, or spaces. It can include lowercase letters, numbers, and dashes.
In the Connector Configuration field, specify the connector configuration.
If it is necessary to reverse the privacy of the work center, toggle the Is Public switch.
If it is necessary to update the short illustrative information about the work center, enter the new information in the Description field.
If it is necessary to reverse the permission for the Canvas Envision Web Creator app for the work center, toggle the Web Creator switch.
If it is necessary to update the teams who should have access to the work center:
For each team whose access to the work center should be suspended, click the bin button on the right side of the team's field.

From the Add a team drop-down list, select one or more teams that will have access to the work center.
Click the Save Center button.
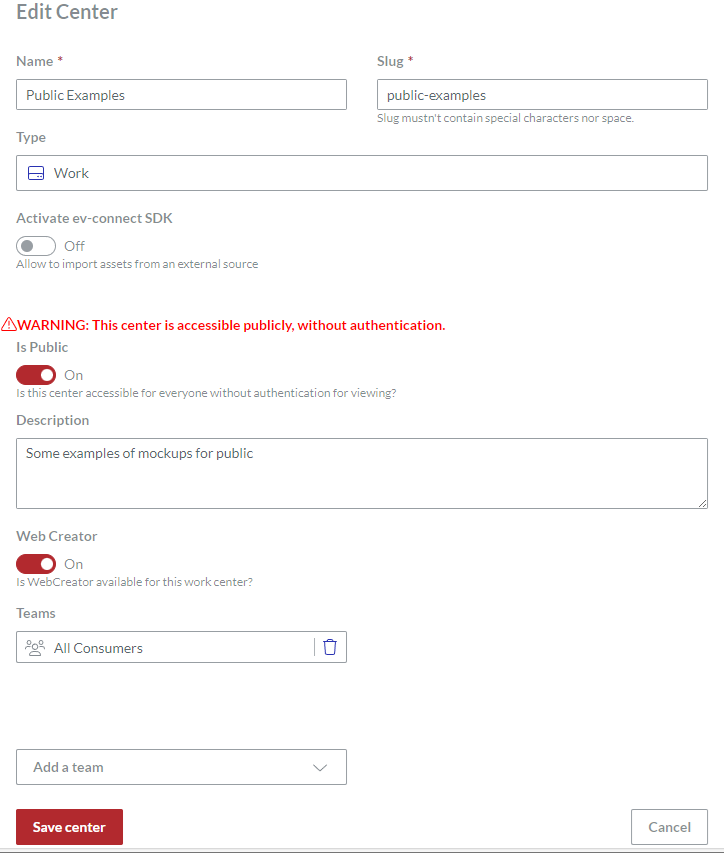
The system saves your changes to the work center and redirects you to the Centers page.
