Managing Rows and Columns
You can insert new and delete existing rows and columns. Additionally, you can change the row height and column width.
Inserting new rows and columns into tables
To insert a new row or column into a table:
Select the cell where you want to insert a new row or column.
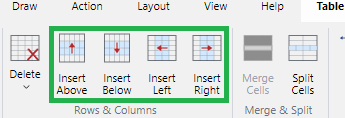
Go to the Rows & Columns panel on the Table contextual ribbon tab.

Click either:
Insert Above: to add a row above the currently selected cell.
Insert Below: to add a row below the currently selected cell.
Insert Left: to add a column to the left of the currently selected cell.
Insert Right: to add a column to the right of the currently selected cell.
Deleting rows, columns, and tables
To delete one or more rows or columns or the entire table:
Select one or more cells of the rows or columns you want to delete.
Click the Delete menu button in the Rows & Columns panel on the Table contextual ribbon tab.

From the Delete menu, click either:
Delete Rows: to delete rows of the currently selected cells.
Delete Columns: to delete columns of the currently selected cells.
Delete Table: to delete the entire table.
Changing row height
To change the height of a row:
Select a cell of the row whose height you want to change.
Either:
Drag the top or bottom border of the selected cell.

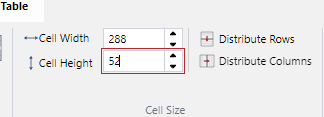
Enter the new value in the Cell Height field in the Cell Size panel on the Table contextual ribbon tab.

Changing column width
To change the width of a column:
Select a cell of the column whose width you want to change.
Either:
Drag the top or bottom border of the selected cell.

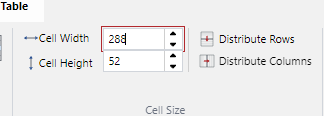
Enter the new value in the Cell Width field in the Cell Size panel on the Table contextual ribbon tab.

Distributing rows evenly in height
To distribute rows evenly in height:
Select the table or the cells of the rows that you want to have the same height.
Click the Distribute Rows button in the Cell Size panel on the Table contextual ribbon tab.

Before
After


Distributing columns evenly in width
To distribute columns evenly in width:
Select the table or the cells of the columns that you want to have the same width.
Click the Distribute Columns button in the Cell Size panel on the Table contextual ribbon tab.


Before

After