Managing Notifications
By default, the Canvas Envision Portal automatically notifies you when:
You are tagged in the comments.
You are added as a reviewer to an Envision document.
A document status is changed to Published.
Feedback is provided on a published document.
You can view and manage notifications and their settings at the following places:
The Notifications menu.
The Notifications page in the Account Area.
The Email notifications Settings page in the Account Area.
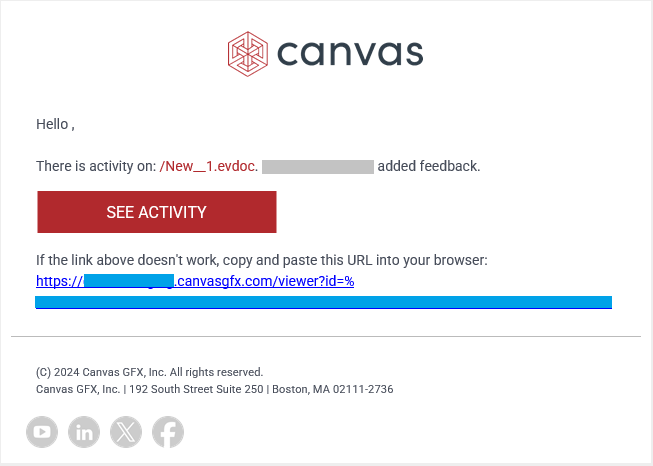
Along with the native notifications, the Portal also sends emails to you.
Notifications menu
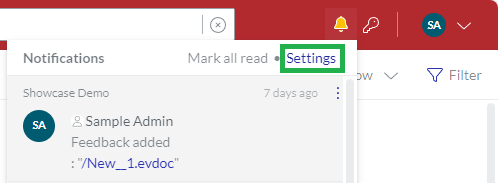
The Notifications menu button on the top bar is a quick access point to notifications and their settings. Clicking this button displays the Notifications menu.
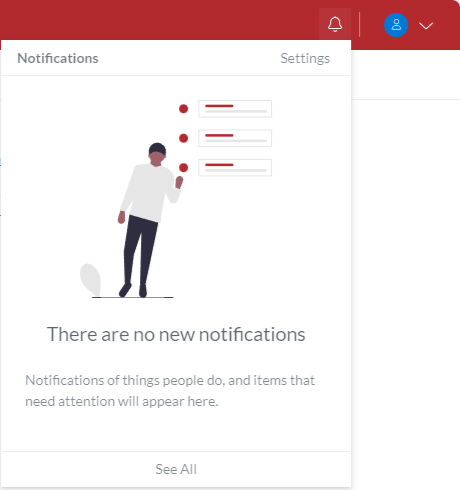
When there are unread notifications, The bell icon in the Notifications menu button is yellow, and the menu displays the notifications in the list.
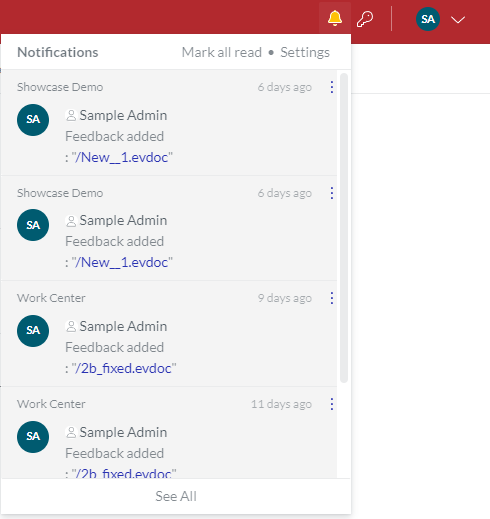
Clicking a notification leads you to the document, comment, or feedback that has triggered the notification in the same browser tab.
The Notifications menu includes the following buttons:
Mark all read to mark all the unread notifications as read.
Settings to go to the Email notifications Settings page in the Account Area.
See All to go to the Notifications page in the Account Area.
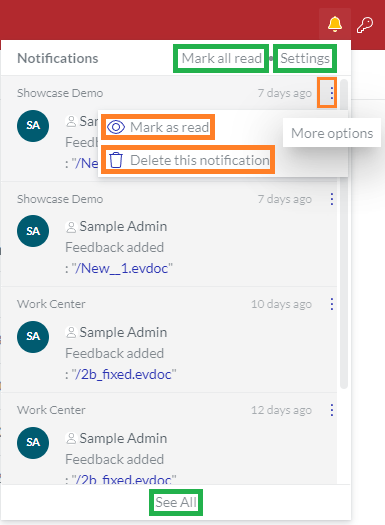
Additionally, each notification has the More options button, clicking which displays a menu with the following buttons to manage a given notification:
Mark as read to mark the given unread notification as read. It is available only for unread notifications.
Delete this notification to permanently delete the given notification.
Notifications Page
The Notifications page is located in the Account Area. It displays all the system notifications to you in the content table, where the notifications are rows, and their properties are columns. To manage these notifications, you can use the content table toolbar and action menu.
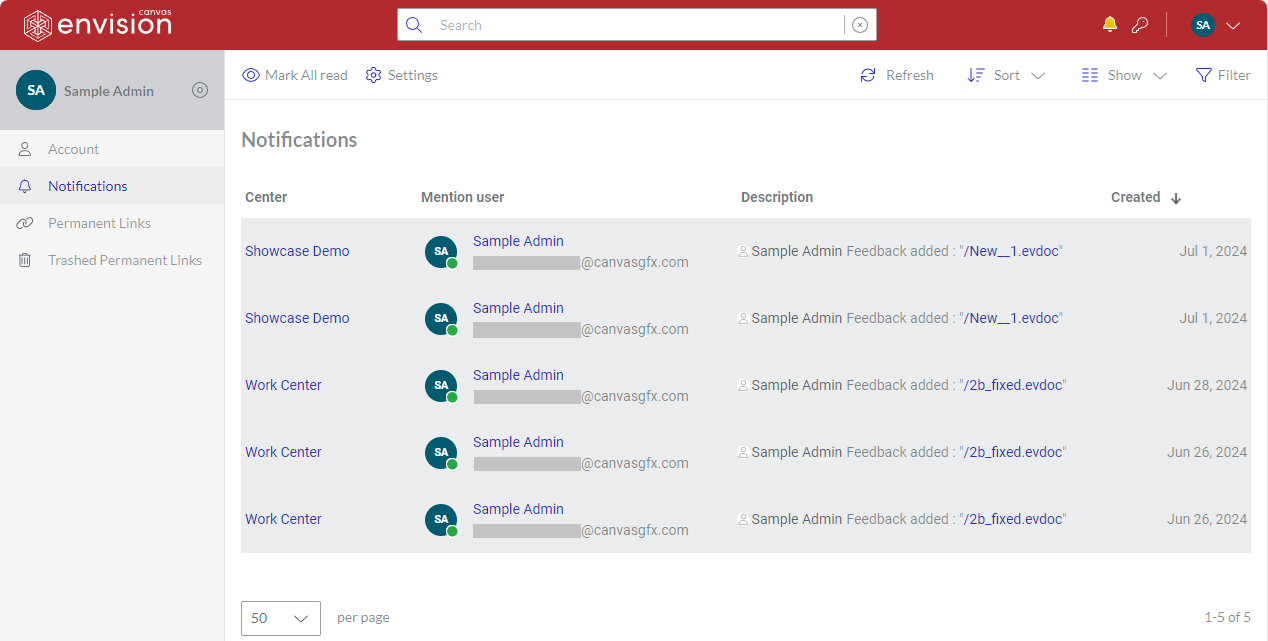
Accessing the Notifications page
To go to all the system notifications to you:
Click the See All button from the Notifications menu.
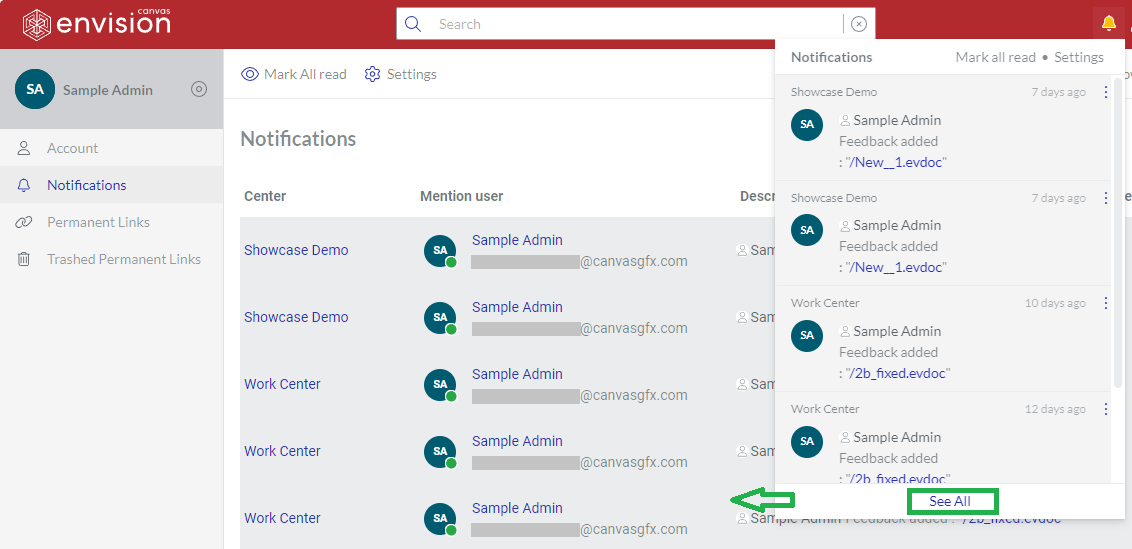
The system leads you to the Notifications page.
Notifications content table toolbar

The Notifications content table toolbar provides the following:
The Mark All read button to mark all the unread notifications as read.
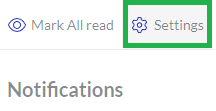
The Settings button to go to the Email notifications Settings page in the Account Area.
The Refresh button to refresh the notifications in the content table.
The Sort drop-down list to sort the notifications in the content table by a given column in ascending or descending order.
The Show drop-down list to show and hide content table columns.
The Filter button to filter the notifications in the content table against your criteria.
Notifications content table columns
By default, the Notifications content table displays only the following columns:
Center
Mention user
Description
Created
With the Show drop-down list, you can hide and show these columns as you wish. You can also show the Read column, which is hidden by default.
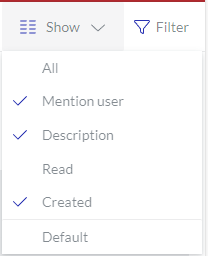
However, the Center column cannot be hidden because it empowers you with the management features for notifications.
Notification action menu
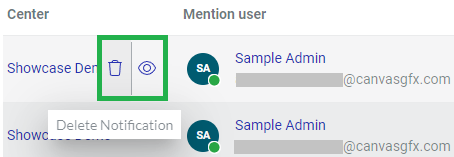
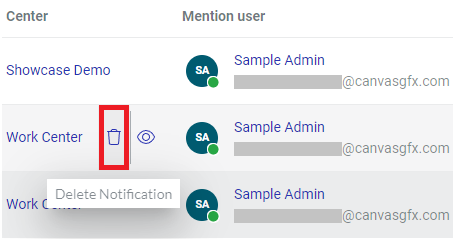
Hovering over a notification in the Notifications content table displays the following buttons for this notification in the Center column:
Delete Notification to permanently delete the given notification.
Mark as read to mark the given unread notification as read. It is available only for unread notifications.
Notification links
Notifications have links in the following Notifications content table columns:
Center to go to the work center pertinent to a given notification.
Mention user to view the details about the user who triggered a given notification event.
Description to view the comment, feedback, or document that triggered a given notification event.

Clicking such a link leads you to the corresponding page in the same browser tab.
Email notifications Settings page
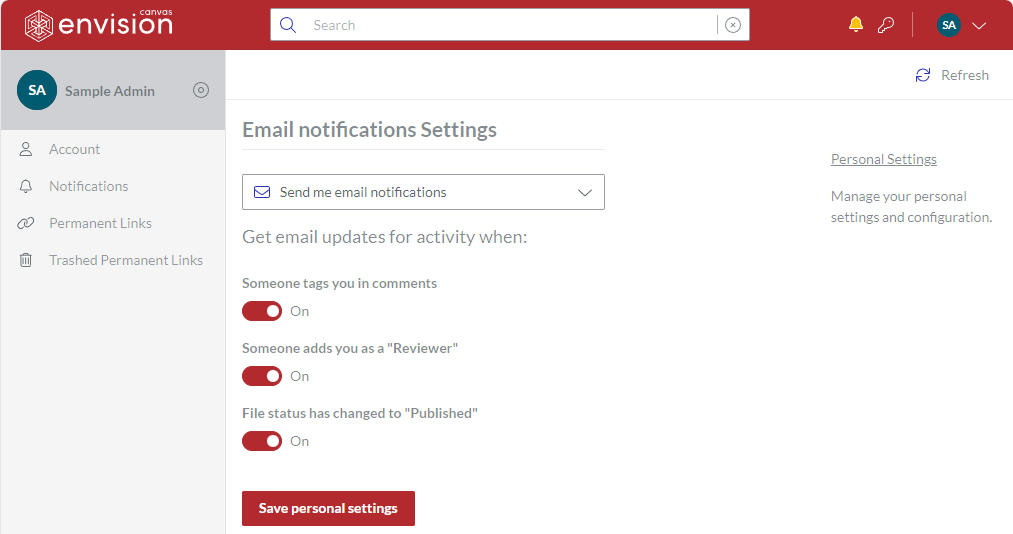
The Email notifications Settings page is located in the Account Area and provides features to configure the system notifications to you.
Accessing the Email notifications Settings page
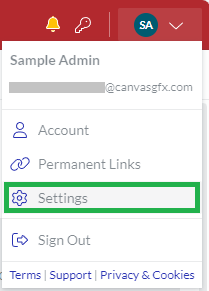
To go to your personal system notification settings, click the Settings button either:
From the Notifications menu.
From the User menu.
On the Notifications content table toolbar.
The system leads you to the Email notifications Settings page.
Email notifications Settings page functionality
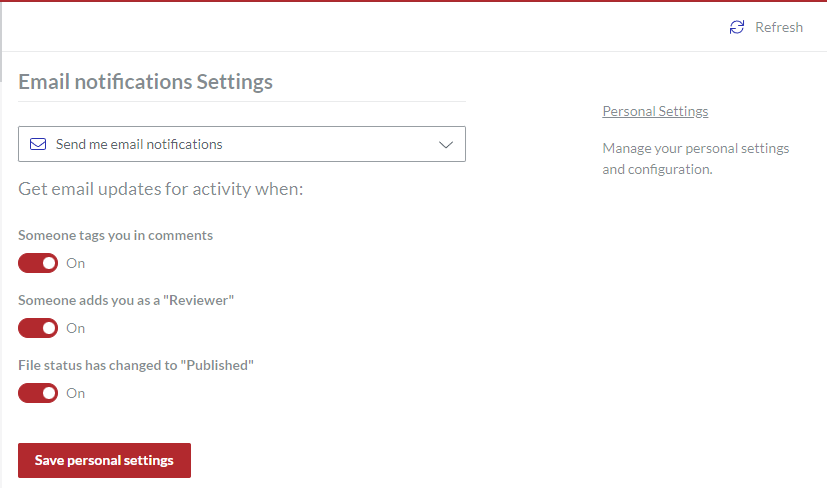
On the Email notifications Settings page, you can allow or forbid the system to email you with the Send me email notifications drop-down list.
Additionally, you can configure about which events you want to receive notifications with the following toggles:
Someone tags you in comments
Someone adds you as a "Reviewer"
File status has changed to "Published"
Marking notifications as read
You can mark one or all notifications as read using the Notifications menu or the Notifications page.
Marking one notification as read using the Notifications menu
To mark a given notification as read using the Notifications menu:
Go to the notification in the Notifications menu.
On the notification, click More options > Mark as read.
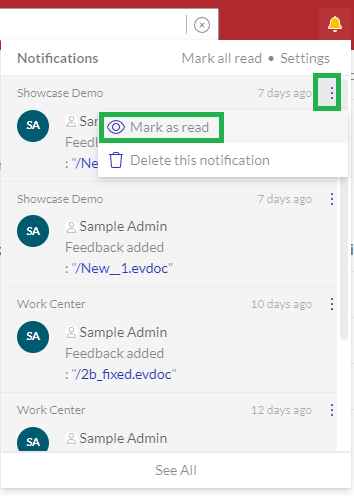
The notification disappears from the Notifications menu.
Marking one notification as read using the Notifications page
To mark a given notification as read using the Notifications page:
Go to the notification in the Notifications page content table.
On the notification, click Mark as read in the Center column.
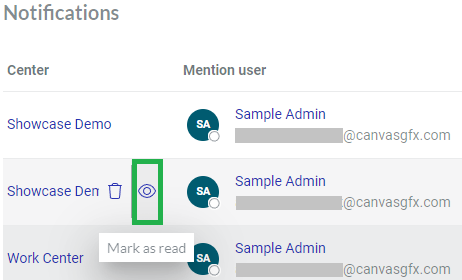
The notification remains in the Notifications page content table. The notification row background is changed from grey to white.
Marking all notifications as read using the Notifications menu
To mark all notifications as read using the Notifications menu:
Go to the Notifications menu.
On the menu top, click the Mark all read button.
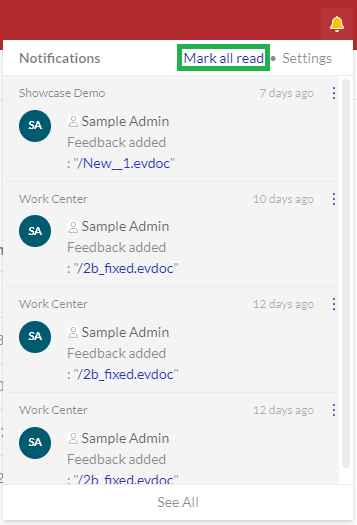
The Notifications menu becomes empty. The bell icon in the menu button becomes transparent.

Marking all notifications as read using the Notifications page
To mark all notifications as read using the Notifications page:
Go to the Notifications page.
On the Notifications page content toolbar, click Mark All read.
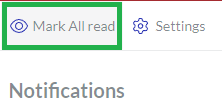
The notifications remain in the Notifications page content table. The background of the notification rows is changed from grey to white. The bell icon in the Notifications menu button becomes transparent.
Deleting notifications
You can delete unread and read notifications permanently from the system using the Notifications menu or the Notifications page. Only one notification can be deleted at the same time.
Deleting notifications using the Notifications menu
To delete a given notification permanently with the Notifications menu:
Go to the notification in the Notifications menu.
On the notification, click More options > Delete this notification.
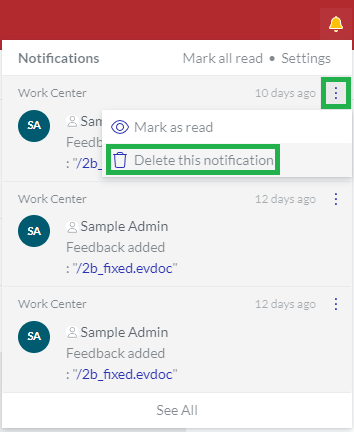
The notification disappears from the Notifications menu and is permanently deleted from the system.
Deleting notifications using the Notifications page
To delete a given notification permanently with the Notifications page:
Go to the notification in the Notifications page content table.
On the notification, click Delete Notification in the Center column.
The Delete dialog pops up.
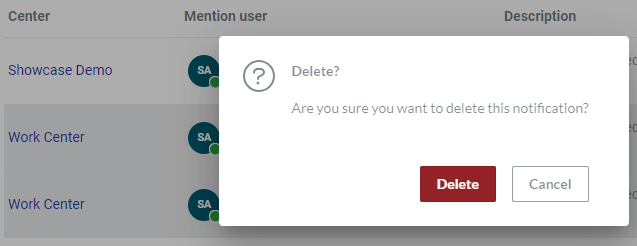
In the Delete dialog, click the Delete button. The notification disappears from the Notifications content table and is permanently deleted from the system.