Managing Master Page Margins
By default, each master page has standard margins that are hidden. You can show or hide all the margins.
Additionally, you can change the margins of one master page existing in the document to the standard or custom dimensions with:
The Page Setup panel on the Layout ribbon tab.
Showing and hiding page and master page margins
By default, the margins of all the pages and master pages in the document are hidden.
To show or hide the margins on all the pages and master pages:
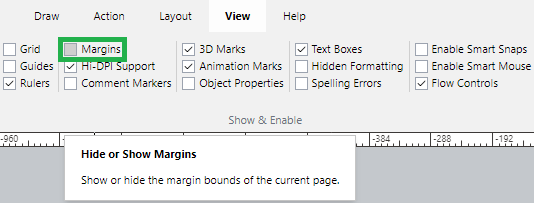
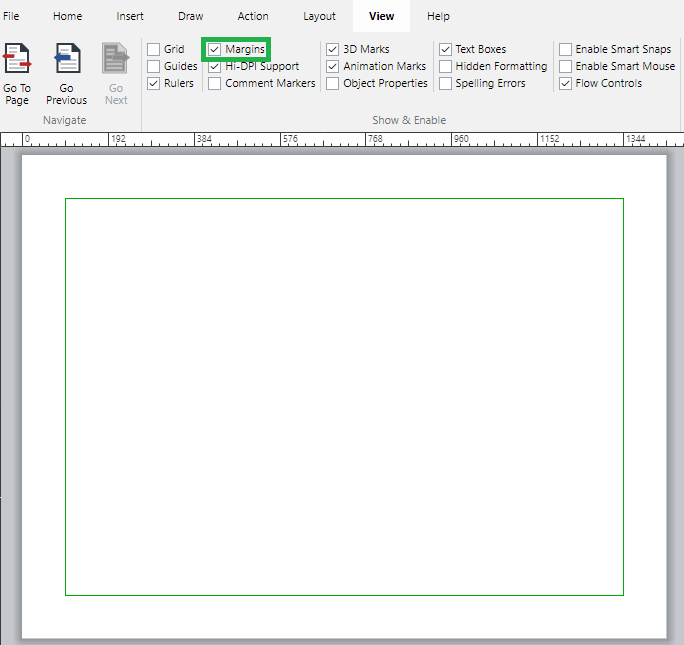
Go to the Margins checkbox in the Show & Enable panel on the View ribbon tab.

Either:
Select the checkbox to show the margins.
Clear the checkbox to hide the margins.
The margins appear or disappear against your checkbox setting.

When on, the margins are visible on the document pages but only when editing the document. They are not printed and are absent when viewing the document in the Canvas Envision Web Viewer.
A page and a master page linked to this page can have different margins. When working with a page linked to a master page in the page layout area with the visible margins, you see the margins of the page, not of the master page. To see the margins of the master page, you should open this master page in the page layout area.
Changing standard master page margins
To change the margins of an existing master page to other standard margins:
Open or go to the Page Navigator pane.
In the Page Navigator pane, click the Master Pages tab.
Select a master page whose margins you want to change to other standard master page margins.
Go to the Layout tab of the ribbon.
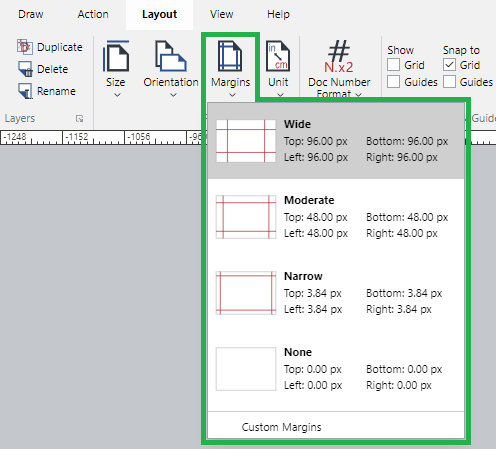
Select the new standard master page margins from the Margins menu in the Page Setup panel.

Setting custom master page margins
To change the margins of an existing master page to custom margins:
Open or go to the Page Navigator pane.
In the Page Navigator pane, click the Master Pages tab.
Select a master page whose margins you want to change to custom master page margins.
Go to the Layout tab of the ribbon.
Select the Custom Margins option from the Margins menu in the Page Setup panel.

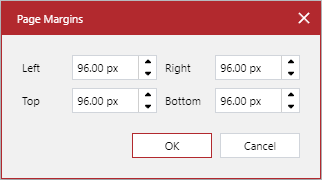
The Page Margins dialog pops up.
In the Page Margins pop-up dialog, enter the new values in the Left, Right, Top, and Bottom fields.

Click the OK button.