Managing Folders
If you are a Creator or Admin in a workspace on the Canvas Envision Portal, you can use the content toolbar and action menu to:
Create folders.
Place files (Envision documents) and shortcuts in the folders.
Organize the folders in multi-level hierarchies.
Features and procedures for folders are the same as for files and shortcuts. You can apply them to one or more folders or folders, files, and shortcuts simultaneously.
Navigating folder hierarchies
Once you go to a work center, you are in the Home folder of that work center. It is the top-most folder in every work center, automatically created along with the work center. You cannot delete or rename it.
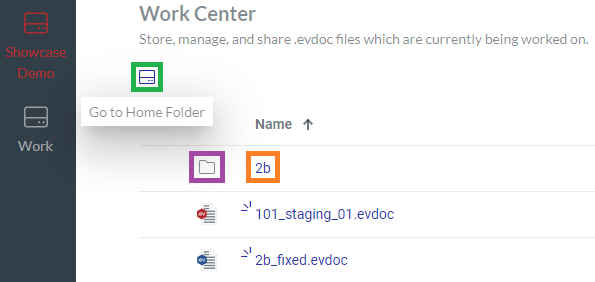
A folder in the content table has a folder icon. By default, the content table displays the folders before the files. Clicking the name of the folder leads to its contents.
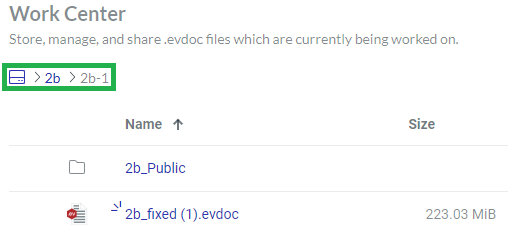
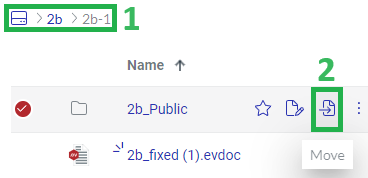
On the left above the content table, there is the path to the folder you are currently in. The path goes from left to right and begins with the Home folder and ends with the current folder. The Home folder is shown as a hard drive icon. All other folders are displayed by their names. The font of the parent folders is blue, while the current folder is light grey. Clicking a parent folder in the path leads to that folder.
Action menu for folders

For a given folder, the action menu features the following options:
Favorite: to add or remove the folder from Favorites. It is filled with blue for folders in Favorites.
Rename: to give the folder another name.
Move: to move the folder with its contents to another folder or work center.
Copy to: to create a copy of the folder with its contents within the workspace.
Delete: to remove the folder with its contents from the workspace permanently.
Creating folders
You can create new folders when either:
Viewing the content table
Moving or copying items
Creating folders when viewing the content table
To create a new folder in the workspace on the Envision Portal:
Go to the work center and folder where the new folder should be.
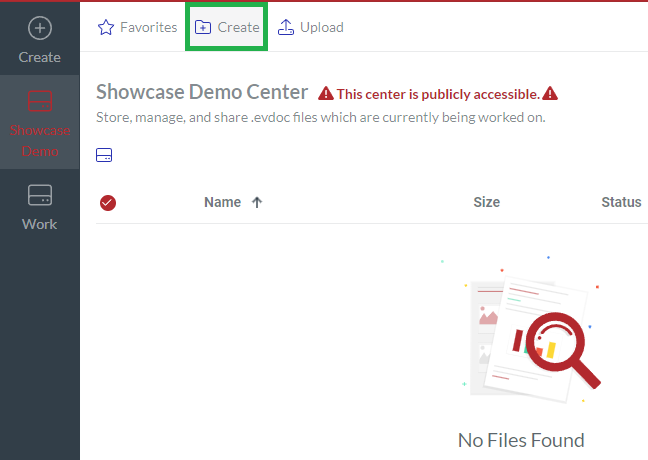
On the content table toolbar, click the Create button.
The Create folder dialog pops up.
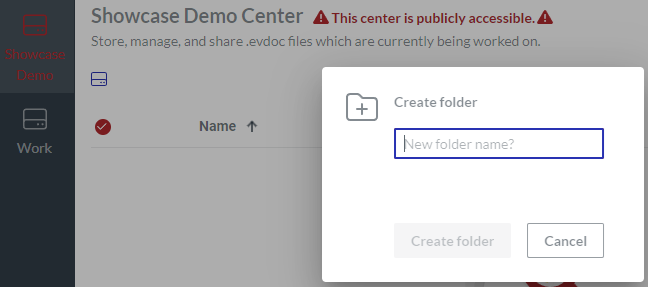
In the New folder name field, enter the name of the new folder and click the Create folder button.
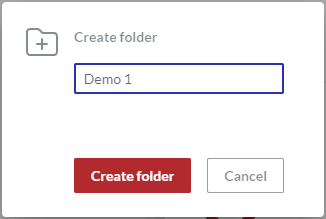
The new folder is created.

Creating folders when moving or copying items
To create a new folder while moving or copying one or more files, shortcuts, or folders:
Start moving or copying the items.
In the Move Items or Copy Items dialog, click the New folder link.
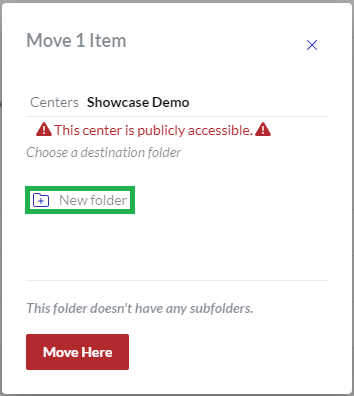
The Enter your folder name field replaces the New folder link.
In the field, enter the name of the new folder.
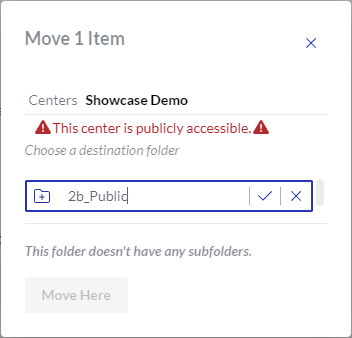
Click the checkmark in the field. The path in the dialog displays the new folder as the destination. The Move Here or Copy Here button becomes active.
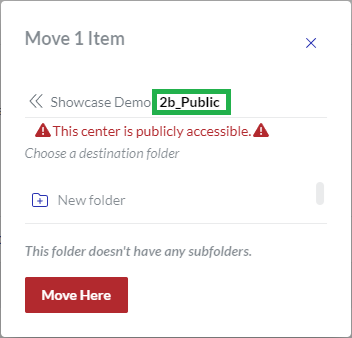
Continue moving or copying the items. The new folder will be created and available when the process is completed.
Moving folders
You can move one or more folders with their contents or folders, files, and shortcuts simultaneously.
Moving one folder
To move a folder with its content to another folder or work center in the workspace:
Go to the folder you want to move.
Click the Move button from the folder action menu.
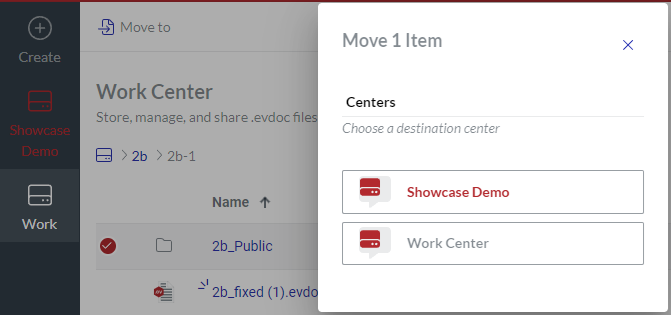
The Move 1 Item dialog pops up and displays the work centers in the workspace.
In the Move 1 Item dialog, specify the work center and folder where the given folder should be moved.
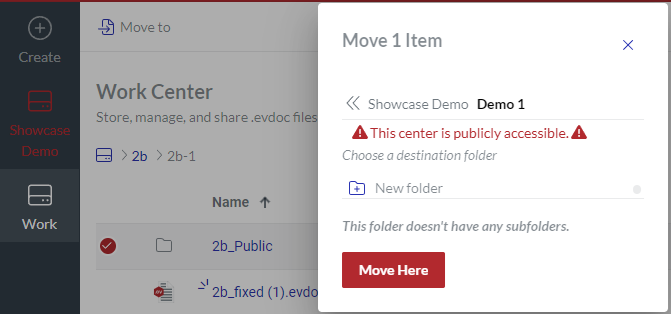
If necessary, create a new folder with the New folder link; see Creating folders when moving or copying items.
Click the Move Here button. The Moving 1 item dialog pops up and displays the movement progress.
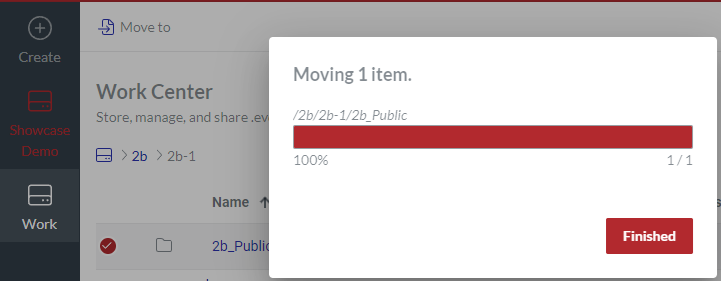
Once the movement is completed, click the Finished button. The folder with its content is moved to the specified work center and folder.
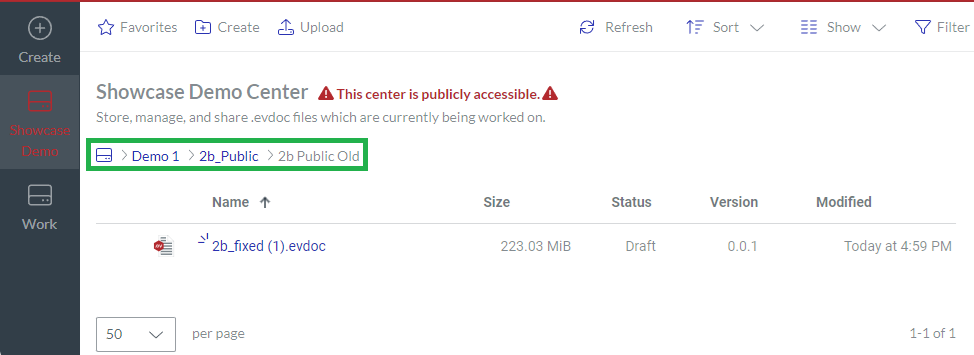
If necessary, go to the destination work center and folder to see the moved folder and its content.
Moving multiple folders
To move multiple folders with their contents or folders, documents, and shortcuts to another folder or work center in the workspace:
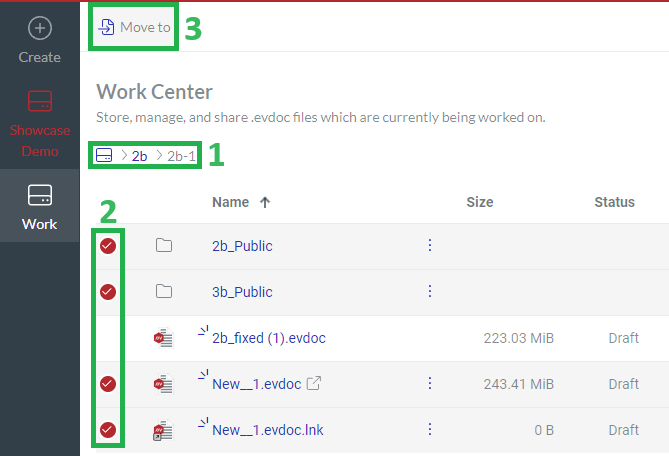
Go to the folders, documents, and shortcuts you want to move.
Select these folders, documents, and shortcuts.
Click the Move to button on the content toolbar.
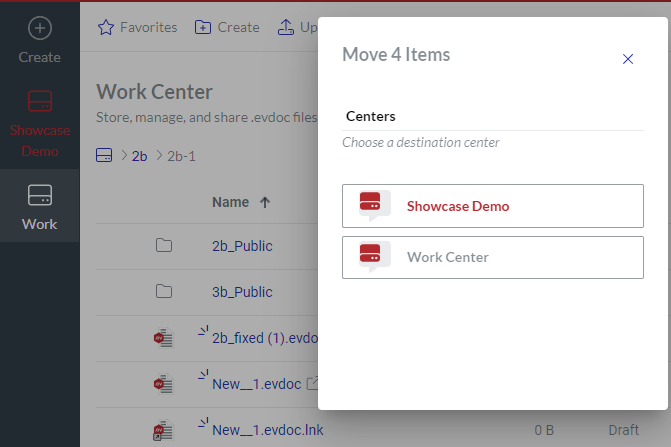
The Move Items dialog pops up and displays the work centers in the workspace. The dialog title includes the number of moved items.
In the Move Items dialog, specify the work center and folder where the items should be moved.
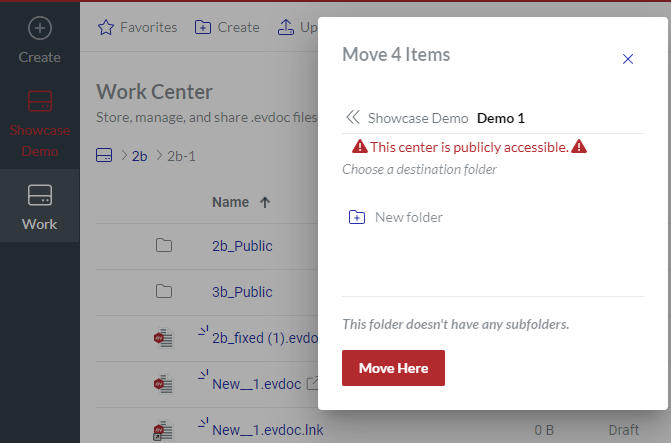
If necessary, create a new folder with the New folder link; see Creating folders when moving or copying items.
Click the Move Here button. The Moving items dialog pops up and displays the movement progress.
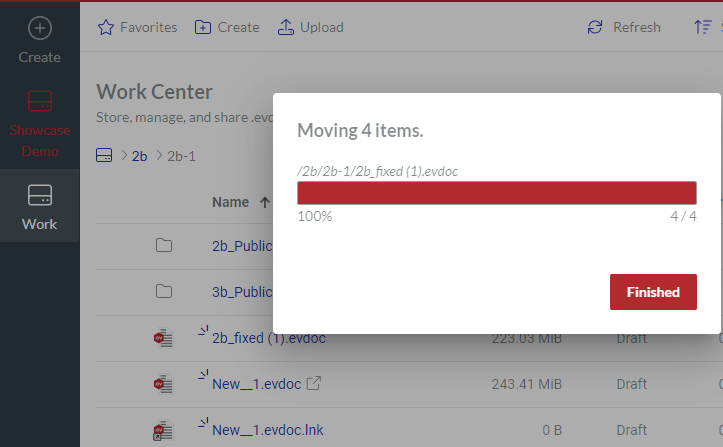
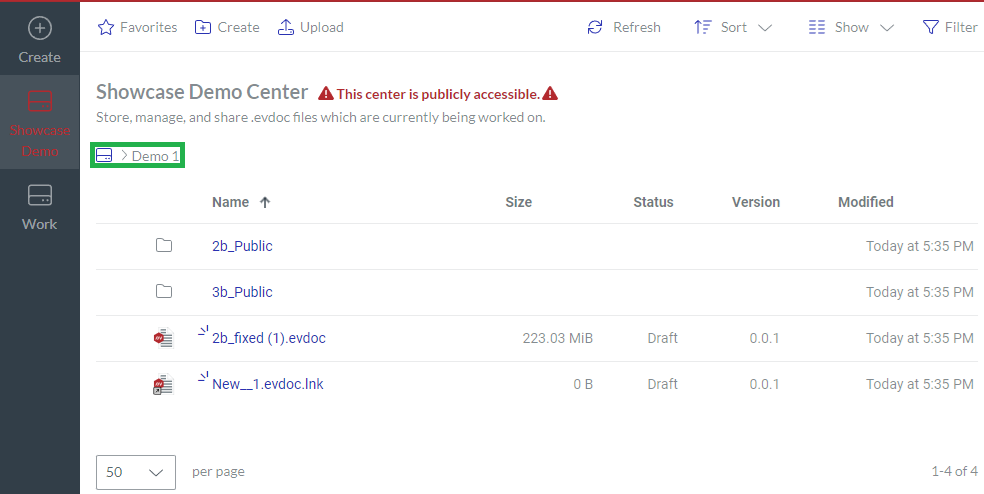
Once the movement is completed, click the Finished button. The folders with their contents, documents, and shortcuts are moved to the specified work center and folder.

If necessary, go to the destination work center and folder to see the moved documents.
Copying folders
You can copy one or more folders with their contents or folders, files, and shortcuts simultaneously.
Copying one folder
To copy a folder with its contents:
Go to the folder you want to copy.
Click the Copy to button from the folder action menu.
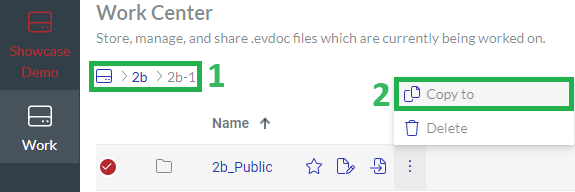
The Copy 1 Item dialog pops up and displays the work centers in the workspace.
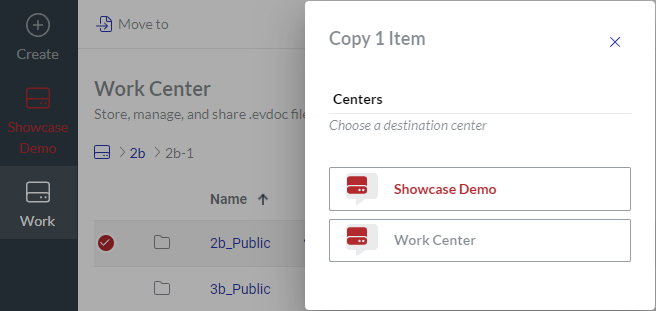
In the Copy 1 Item dialog, specify the work center and folder where the folder with its contents should be copied.
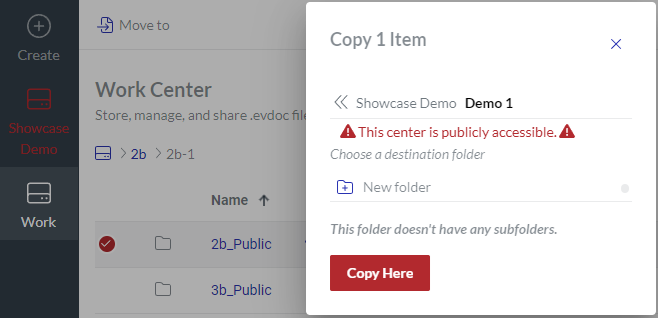
If necessary, create a new folder with the New folder link; see Creating folders when moving or copying items.
Click the Copy Here button. The Copying 1 item dialog pops up and displays the copying progress.
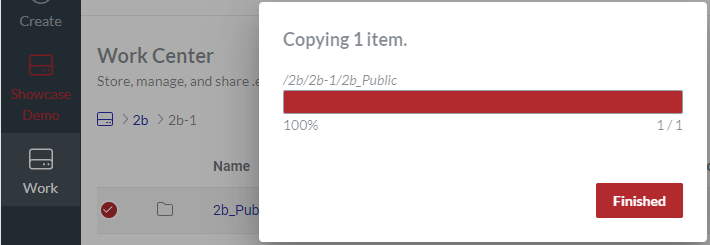
Once copying is completed, click the Finished button. The folder is copied to the specified work center and folder.
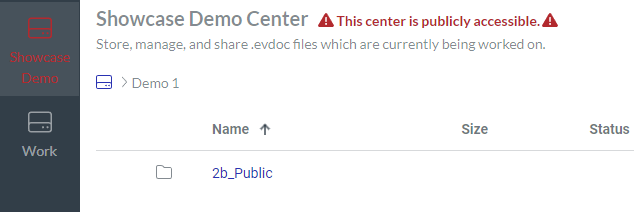
If necessary, go to the destination work center and folder to see the copied folder.
Copying multiple folders
To copy multiple folders with their contents or folders, files, and shortcuts simultaneously:
Go to the folders, files, and shortcuts you want to copy.
Select these folders, documents, and shortcuts.
Click the Copy to button from the action menu of a selected folder.
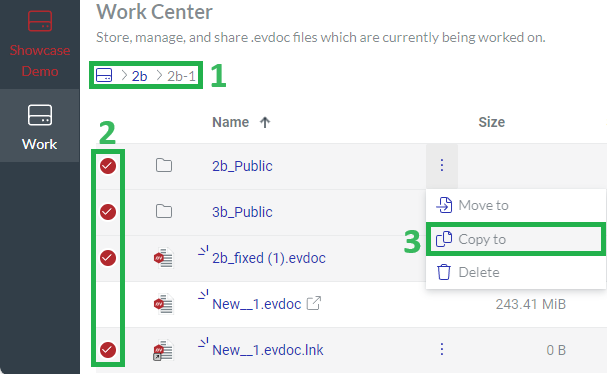
The Copy Items dialog pops up and displays the work centers in the workspace. The dialog title includes the number of copied items.
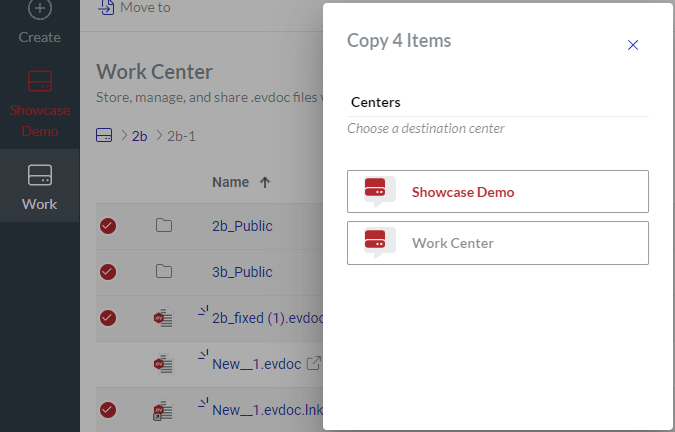
In the Copy Items dialog, specify the work center and folder where the items should be copied.
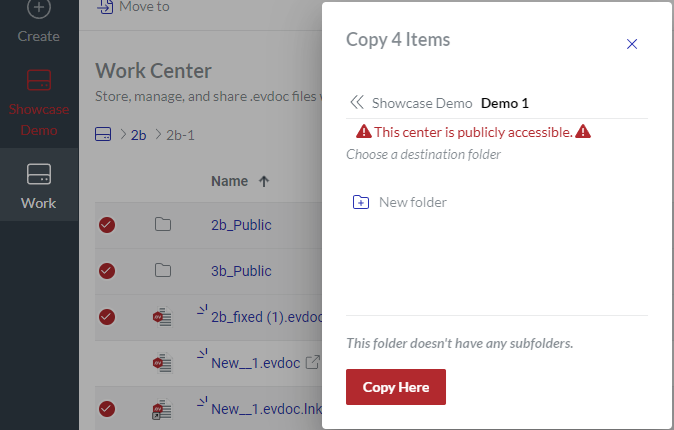
If necessary, create a new folder with the New folder link; see Creating folders when moving or copying items.
Click the Copy Here button. The Copying Items dialog pops up and displays the copying progress.
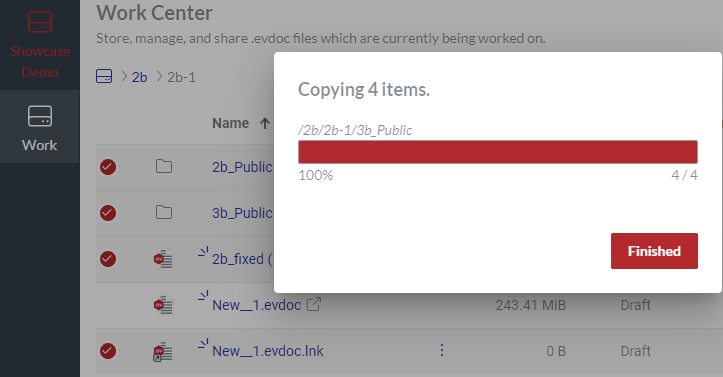
Once copying is completed, click the Finished button. The folders with their contents, documents, and shortcuts are copied to the specified work center and folder.
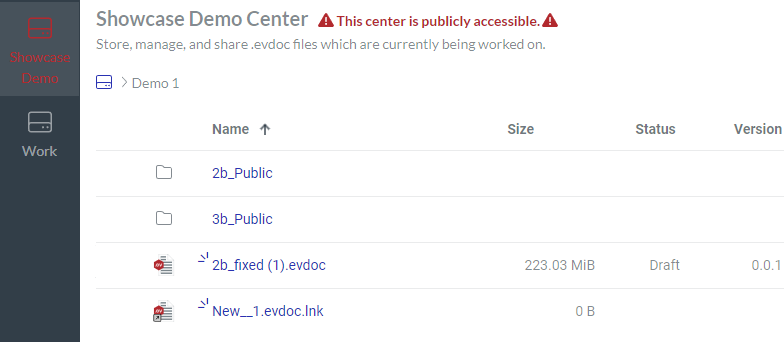
If necessary, go to the destination work center and folder to see the copied documents.
Deleting folders
You can permanently delete one or more folders with their contents or folders, documents, and shortcuts simultaneously from the workspace on the Portal.
Deleting one folder
To delete an existing folder with its contents from the workspace permanently:
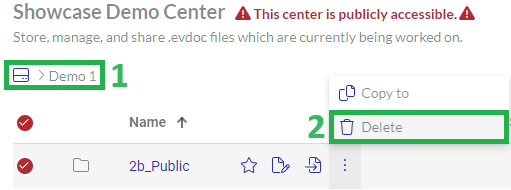
Go to the folder you want to remove from the Portal.
Click the Delete button from the folder action menu.
The Delete files dialog pops up.
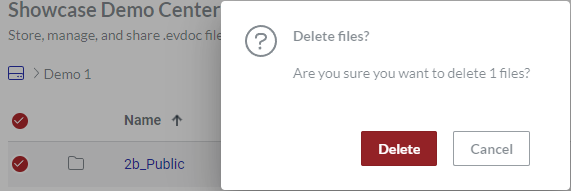
In the Delete files dialog, click the Delete button. The Deleting 1 item dialog pops up and displays the deletion progress.
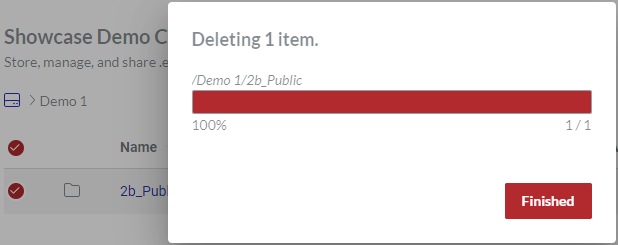
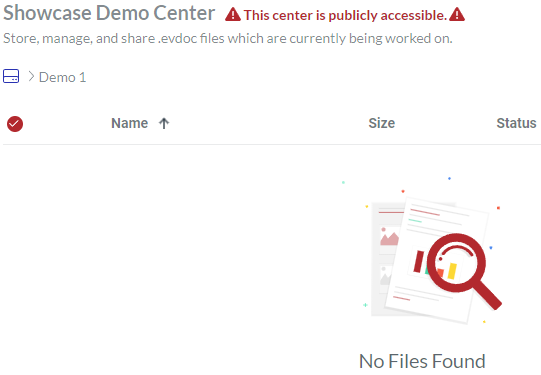
Once the deletion is completed, click the Finished button. The folder with its contents is permanently deleted from the workspace.
Deleting multiple folders
To delete permanently multiple existing folders with their contents or folders, files, and shortcuts simultaneously from the workspace on the Portal:
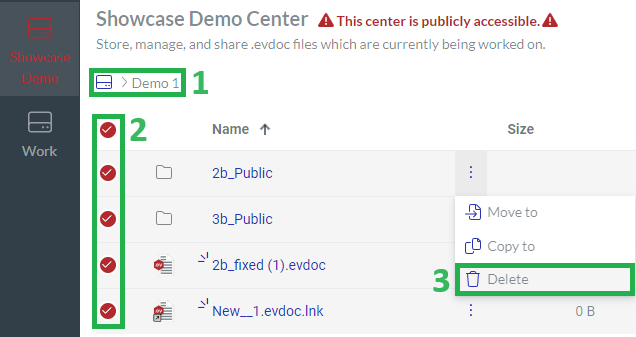
Go to the folders, files, and shortcuts you want to remove from the Portal.
Select these folders, documents, and shortcuts.
Click the Delete button from the action menu of a selected folder.
The Delete files dialog pops up.
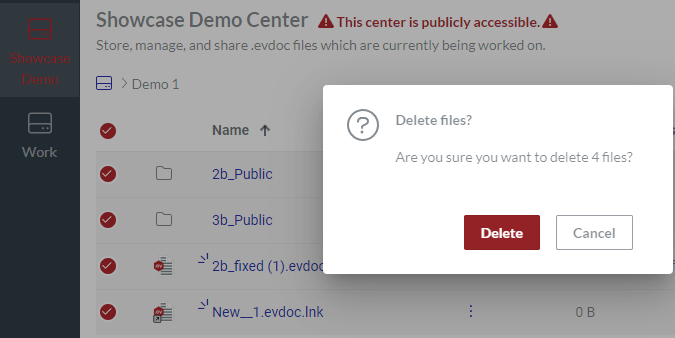
In the Delete Files dialog, click the Delete button. The Deleting items dialog pops up and displays the deletion progress.
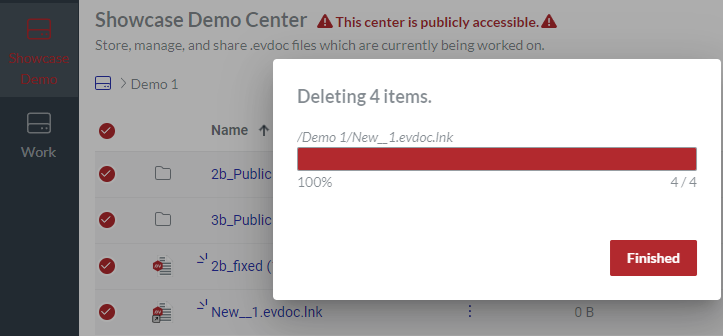
Once the deletion is completed, click the Finished button. The folders with their contents, documents, and shortcuts are permanently deleted from the workspace.
