Updating Text and Text Box Attributes
You can change text and text box attributes any time after you have created Text objects.
Updating basic text attributes
Depending on whose text attributes you want to change, do either:
Of some text in a text object—select the text in the text edit mode.
Of the entire text in a text object—select the text object.
Change the following settings in Font panel on the Home tab of the Ribbon:

Font
Font Size
Font Style
Character Spacing
Font Color
Removing all the font styles applied to text objects
To remove the font styles applied to a text object all at once:
Click the Clear All Formatting button in the Text Style panel on the Text contextual tab of the Ribbon.

Changing character spacing
To change the character spacing of text:
Select text, a text object, or objects you want to change the character spacing.
Click the Character Spacing split button in Font panel on the Home tab of the Ribbon.
Select a preset option or click the Custom option.
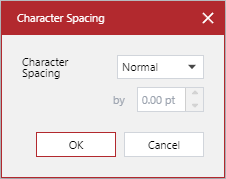
When the Custom Margins option is selected, the Character Spacing dialog pops up. Specify the spacing in this pop-up dialog box.
Changing text alignment
To change the alignment of text in the text box:
Select a text object or objects you want to change the text alignment.
Go to the Alignment panel on the Text contextual tab of the Ribbon.
In the Alignment panel, click the alignment button you need.

Text alignment options
Top Left
Top Center
Top Right
Horizontal Justification
Middle Left
Middle Center
Middle Right
Vertical Justification
Bottom Left
Bottom Center
Bottom Right
Both Justification
Changing text box margins
To change the text box margins of one or more text objects:
Select a text object or objects whose text box margins you want to change.
Go to the Alignment panel on the Text contextual tab of the Ribbon.
From the Margins drop-down menu, select a margin preset option or Custom Margins.
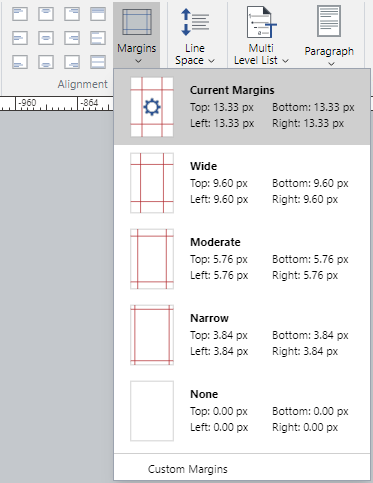
When Custom Margins is selected, the Text Margins dialog box pops up.
Specify the margins in the Text Margins pop-up dialog box.
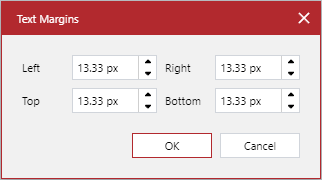
When done, click the OK button.
You cannot make a Text object smaller than the text font size plus the margins.
All margins: 10 pt
All margins: 0 pt

Changing line spacing
To change the line spacing of one or more text objects:
Select a text object or objects whose line spacing you want to change.
Go to the Leading panel on the Text contextual tab of the Ribbon.
From the Line Space drop-down menu, select a line spacing preset option or Line Space Options.
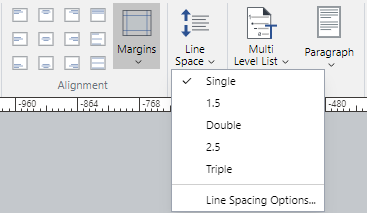
When Line Space Options is selected, the Line Spacing dialog box pops up.
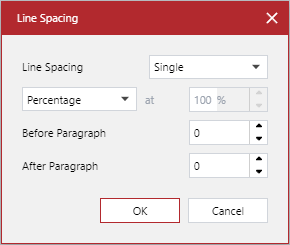
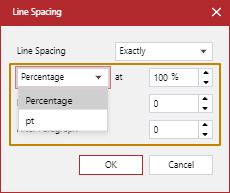
Select Exactly from the Line Spacing drop-down list.
Select Percentage or pt from the drop-down list.
Type the values in the at field.
Click OK.
Changing the space before and after paragraphs
To change the space before and after paragraphs in one or more text objects:
Select one or more paragraphs or text objects where you want to change the spaces before or after paragraphs.
Go to the Leading panel on the Text contextual tab of the Ribbon.
From the Line Space drop-down menu, select Line Space Options.

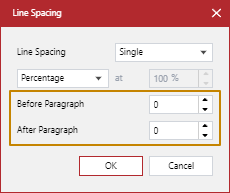
The Line Spacing dialog box pops up.

Type a values in the Before Paragraph field.
Type a values in the After Paragraph field.
Click OK.
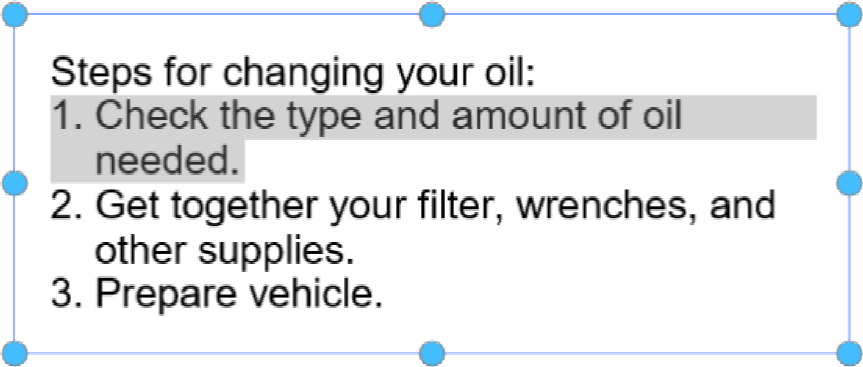
Before Paragraph: 0
After Paragraph: 0
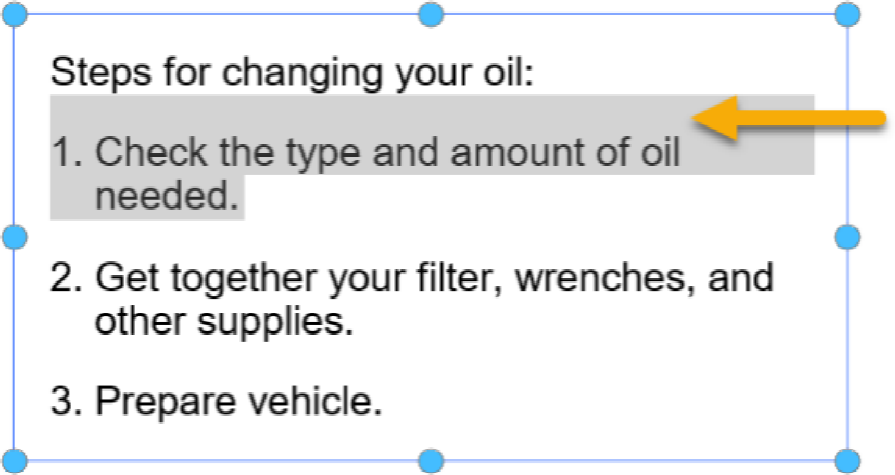
Before Paragraph: 10
After Paragraph: 0
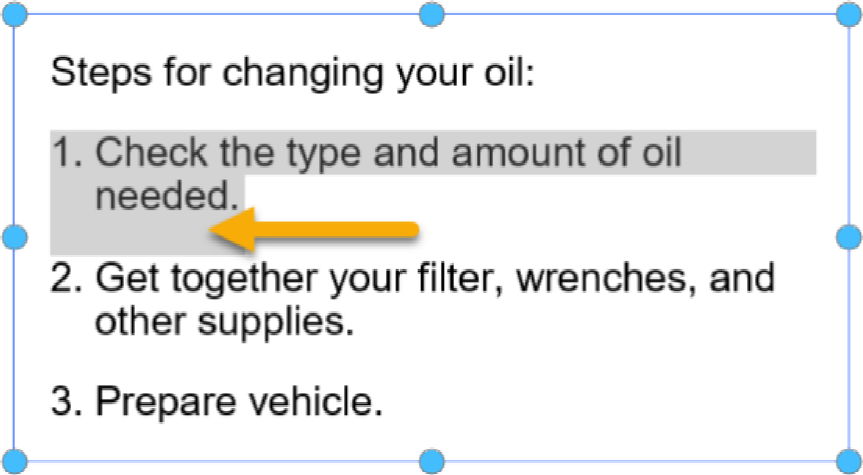
Before Paragraph: 0
After Paragraph: 10
Show and hiding text formatting symbols
To show or hide text formatting symbols:
Go to the Hidden Formatting checkbox in the Show & Enable panel on the View ribbon tab.
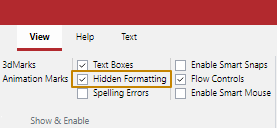
Either:
Clear the checkbox to hide text formatting symbols.
Select the checkbox to show text formatting symbols.

The following are the most common formatting symbols:
Tab

Space

Carriage Return

Soft Return

Changing the background and outline of text objects
To change the background or outline of one or more text objects:
Select one or more text objects whose background or outline you want to change.
Go to the Shape Styles panel on the Home or Draw tab of the Ribbon.
Select a color, gradient, hatch, or image from the Fill drop-down menu.
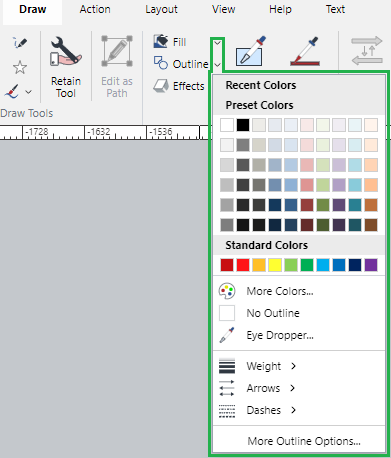
Select a color, weight, arrow, or dash from the Outline drop-down menu.

Changing text box types
To change the type of the text box of one or more text objects:
Select one or more text objects whose text box type you want to change.
Go to the Text Box Type panel on the Text contextual tab of the Ribbon.
From the Auto Size drop-down menu, select a new text box type.
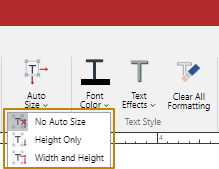
Text box types
No Auto Size
The No Auto Size type of text box is created when clicking and dragging the text tool to define a text box size or past text with a carriage return.
When a line reaches the right side of the text box, the line flows to the next line. When the line reaches the bottom of the text box, the text will overflow and show the overflow indicator at the bottom right.
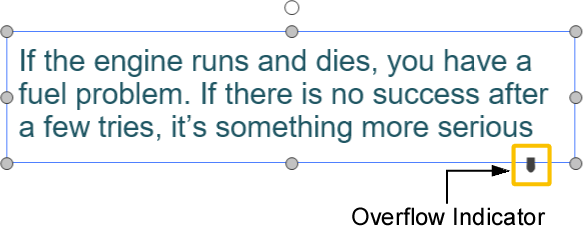
To fix the overflown text, you should either:
Increase the height, width, or both of the text Box to show the hidden texts.
Make the entire texts smaller.
Height Only
The Height Only type of text box is created when pasting formatted text.
When a line reaches the right side of the text box, the line flows to the next line. The width of the text box will not get adjusted automatically. The more you type texts in lines, the more the height of the text box increases accordingly.
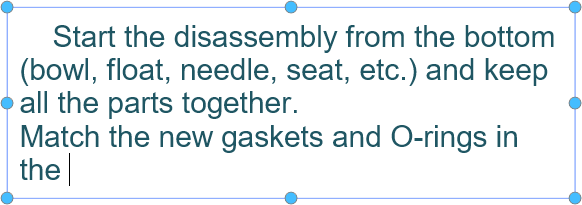
The width of the text box is fixed.
Width and Height
The Width and Height type of text box is created when either:
Clicking and typing text with the Text tool.
Pasting text without any carriage return.
The more you type text, the wider the text box becomes until you press the Enter key. When the Enter key is pressed, the I-beam moves to the next line. The more you type texts in lines, the more the height of the text box increases accordingly.

The width of the text box gets adjusted to the longest line with a carriage return.
Setting paragraph indents
To set the indent for one or more paragraphs in one or more text objects:
Select one or more paragraphs or text objects where you want to set the indent for paragraphs.
Go to the Format panel on the Text contextual tab of the Ribbon.
Click the bottom part of the Paragraph split button.
Click the Indents command from the Paragraph drop-down menu.
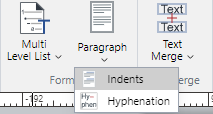
The Indents dialog box pops up.
In the Indents pop-up dialog, set the values as you need.
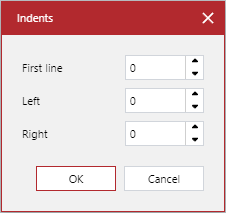
When you are done, click the OK button.
Indents pop-up dialog fields
To set the indent for paragraphs, the Indents pop-up dialog inculdes the following fields:
First Line: an indent for the first line of a paragraph. The first line will be indented from the left border of the text box by the distance specified in this field.
Left: the distance between the left border of a text box and the left indent of a paragraph in the left edit box.
Right: the distance between the right border of a text box and the right indent of a paragraph in the right edit box.
Indent examples
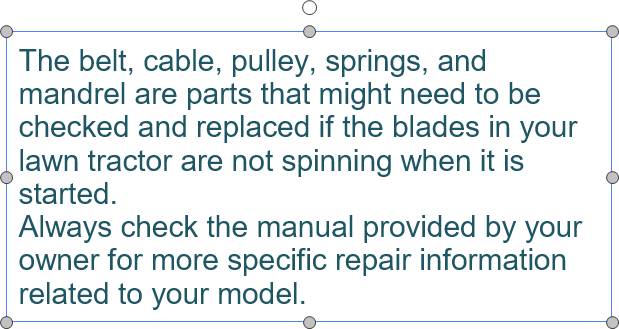
First Line: 0
Left: 0
Right: 0
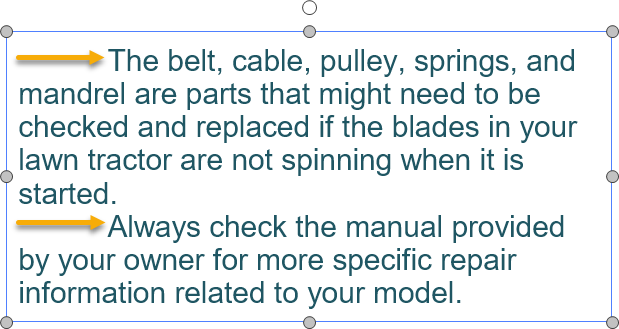
First Line: 36
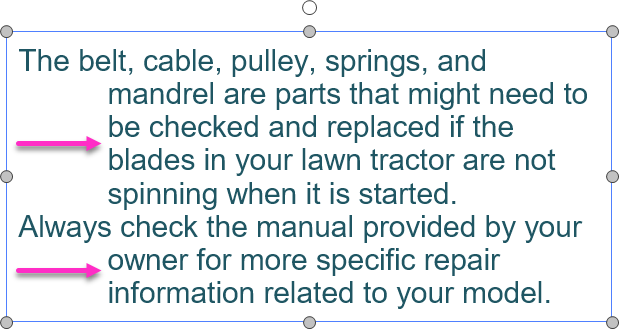
Left: 36
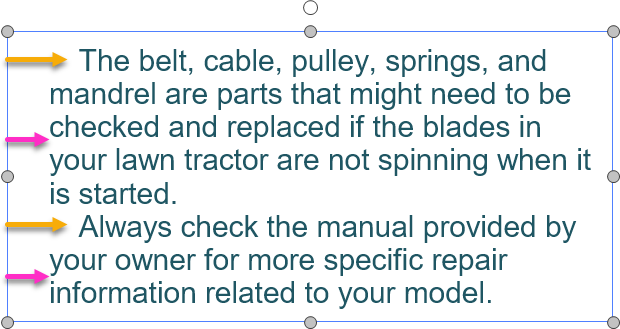
First Line: 24
Left: 12
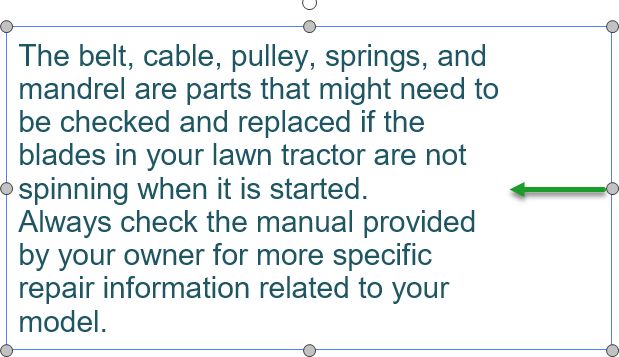
Right: 36
Setting paragraph hyphenation
To set the hyphenation for one or more paragraphs in one or more text objects:
Select one or more paragraphs or text objects where you want to set the hyphenation for paragraphs.
Go to the Format panel on the Text contextual tab of the Ribbon.
Click the bottom part of the Paragraph split button.
Click the Hyphenation command from the Paragraph drop-down menu.
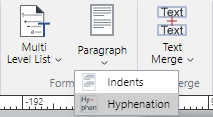
The Indents dialog box pops up.
In the Hyphenation pop-up dialog, set the values as you need.
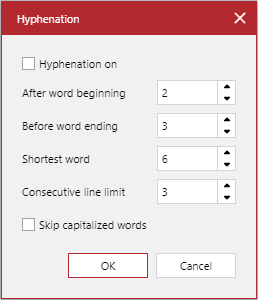
When you are done, click the OK button.
Hyphenation pop-up dialog fields
To set the indent for paragraphs, the Hyphenation pop-up dialog inculdes the following fields:
Hyphenation on: a flag to enable the hyphenation when selected and disable it when cleared.
After word beginning: the minimum number of letters that must precede a hyphen.
Before word ending: the minimum number of letters that must follow a hyphen.
Shortest word: the minimum number of letters that a word must have to be hyphenated.
Consecutive line limit: the number of consecutive lines that can end in hyphens, e.g., if four consecutive lines could end in hyphens but the limit is three, the last word of the fourth line will not be hyphenated.
Skip capitalized words: a flag to prevent proper names and other words beginning with a capital letter from being hyphenated when selected.
Hyphenation examples
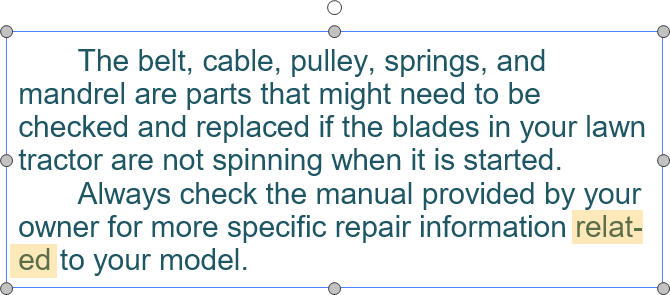
After word beginning: 2
Before word ending: 4
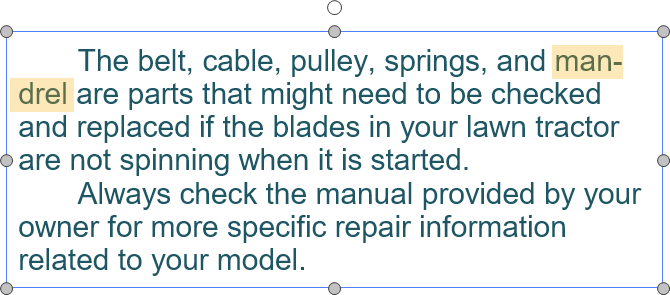
After word beginning: 4
Before word ending: 3
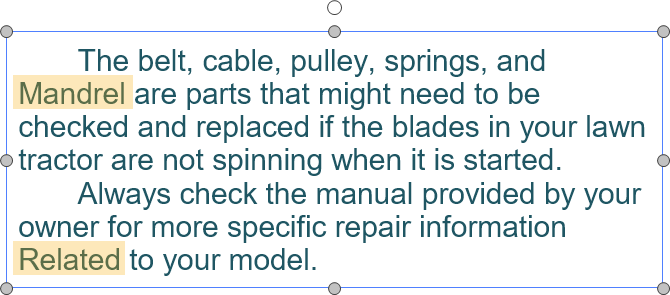
After word beginning: 2
Before word ending: 3
Skip capitalized words: on
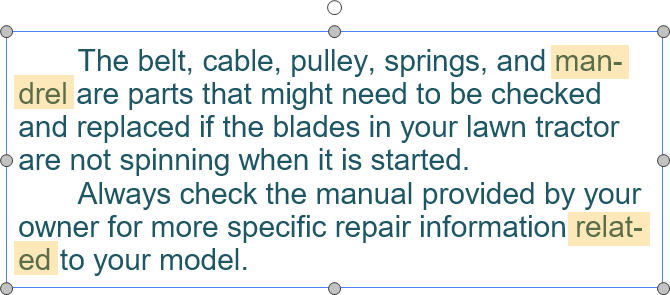
After word beginning: 2
Before word ending: 3
Skip capitalized words: off
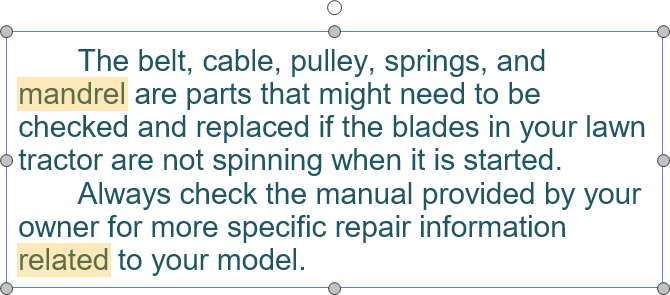
After word beginning: 2
Before word ending: 3
Shortest word: 8

After word beginning: 2
Before word ending: 3
Shortest word: 7